Let’s start with why you would even want to do this. A self-hosted DNS server can improve home network:
- security
- performance
- privacy
There are quite a few options for DNS server software, here’s a decent assessment of the different options. The winner here seems to be Technitium and after running it myself for a while now, I’m pretty happy with it.
Website: https://technitium.com/dns/
GitHub: https://github.com/TechnitiumSoftware/DnsServer
What you’ll need:
I start with Debian for most of of these articles, you can install it on bare metal using Ventoy or spin up a VM on Proxmox. You’ll also need to have Docker Compose, I’ve provided instructions for that.
docker-compose.yml for your initial Technitium DNS server
services:
  dns-server:
    container_name: dns-server  # Explicit container name; useful for referencing

    hostname: dns1  # Sets internal hostname; useful for host-aware logging and other use cases

    image: technitium/dns-server:13.5.0  # Use a specific version or simply the latest version

    network_mode: "host"  # Allows the DNS server to bind directly to host ports (required for port 53 UDP/TCP on host)

    volumes:
      - config:/etc/dns  # Persist DNS server configuration and data; as an alternative you can use a bind mount.

    restart: unless-stopped  # Automatically restart container unless manually stopped; attempts persistence across reboots.

volumes:
  config:  # Declares a named volume used to store persistent data for the app container
You can also find this on GitHub: https://github.com/buildtestlearn-io/dns-server/blob/main/docker-compose.yml
Once you have your docker-compose.yml, run docker compose up. I’m using the -d flag here so that it runs as a daemon in the background.
docker compose up -dAfter you’ve done this, make sure things are running as they should be.
docker ps -aIf all has gone well, you should see something like this. The status field is what we care about and it looks like the container is up.

Our next step is to visit the web GUI which is using the default port of 5380. Open a web browser and bring up whatever the IP of your machine or VM is.
Improving local network security
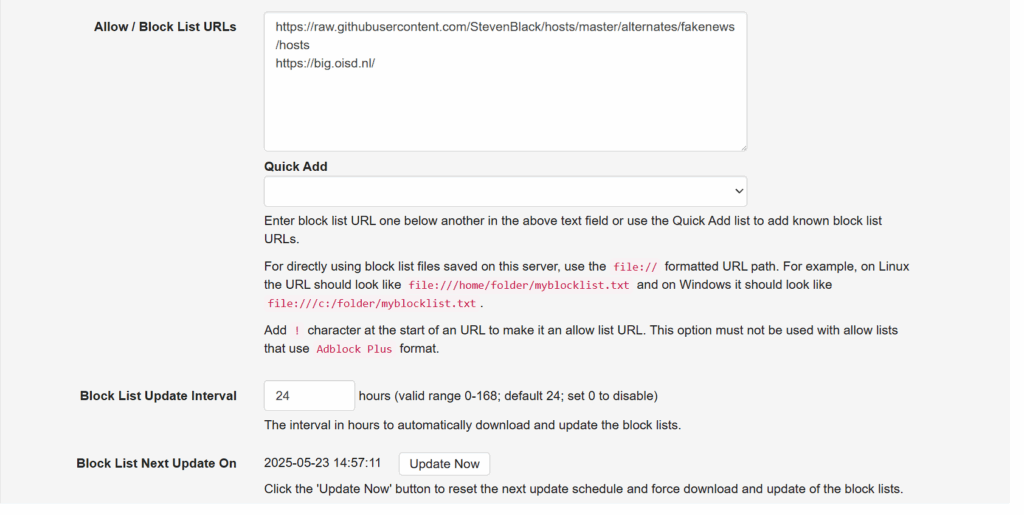
Once it’s up and running, access the web interface and navigate to “Settings” and then “Blocking”.
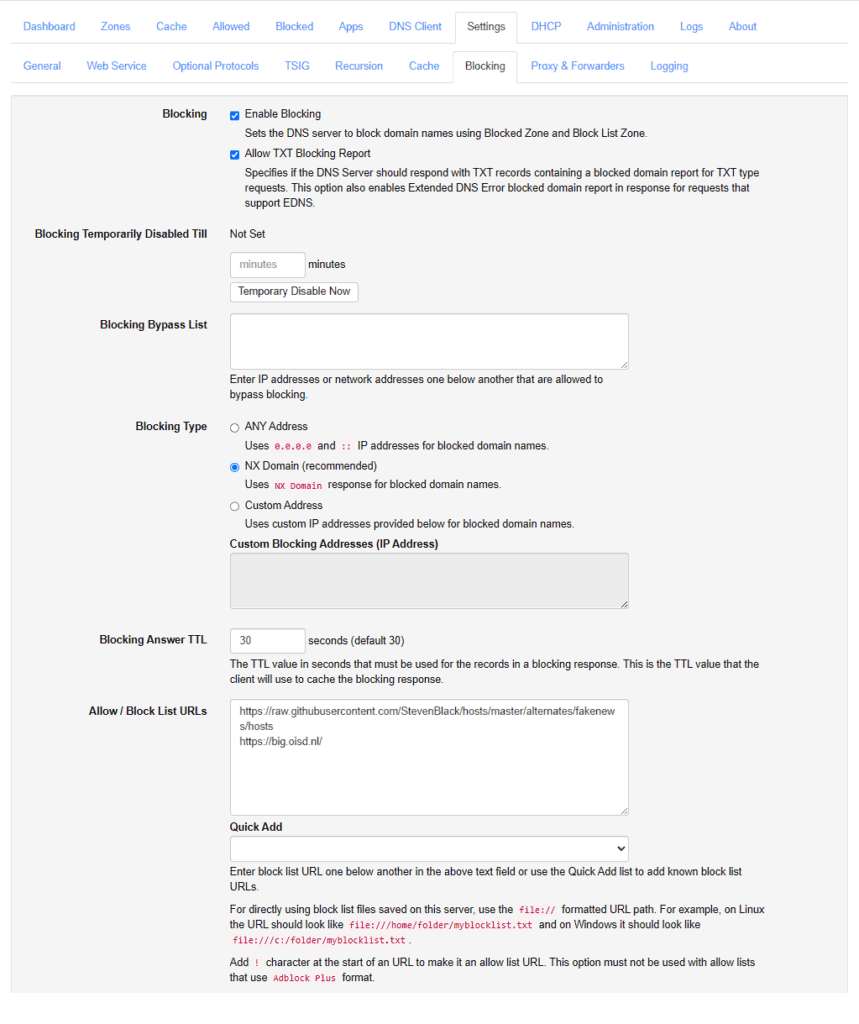
By using well-known blocklists (like Steven Black’s or OISD), you can automatically prevent DNS resolution of known ad servers, trackers, and malicious domains. Note that it’s easiest to use the “Quick Add” drop down here but I’d encourage you to manually check out the projects behind these lists.

Finally, make sure to have this auto-update. Do note that if you want to enable a domain that’s being blocked, you can always do so by adding the domain to the “Allowed” list.
Improving network performance
Running your own DNS server speeds up your local network. Instead of sending every domain lookup to an external DNS resolver (which adds latency and leaks traffic), Technitium resolves names locally, with sub-millisecond response times for cached entries. When I use dig, I usually get between 0 and 4ms for my local DNS and 8-12 for my external DNS but I have fiber, so my speeds and latency are exceptionally low. Slower internet connections will benefit more.
Excellent information on dnsperf.com can help you understand different DNS providers based on performance.
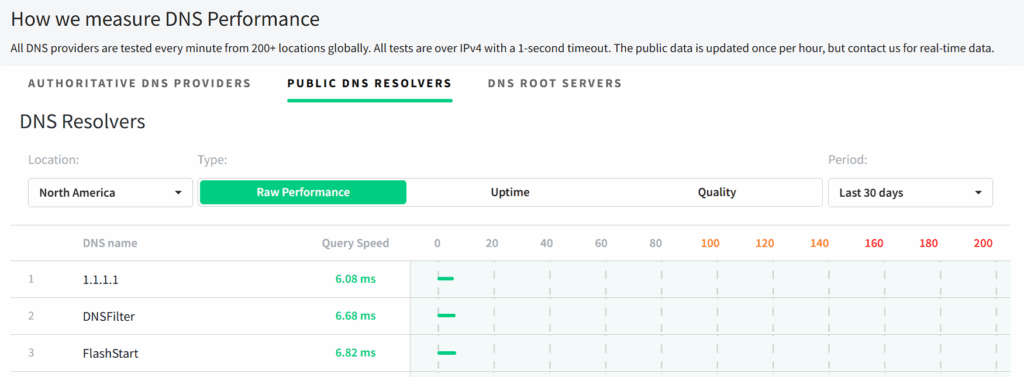
Screenshot from https://www.dnsperf.com/#!dns-resolvers
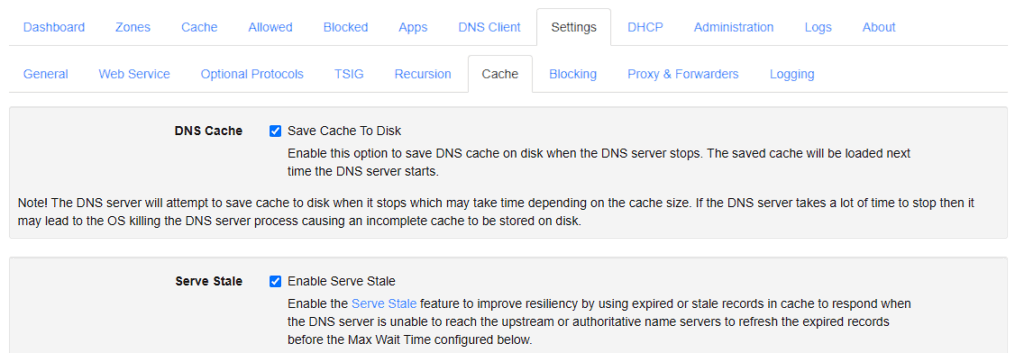
Navigate to Settings -> Cache and enable Save Cache to Disk. When a domain name is in cache, your DNS server won’t need to forward the DNS request, resolving it on your internal DNS server instead.
Improving privacy
Every time you visit a website, launch an app, or stream a video, your device sends out DNS queries—usually in cleartext—to DNS resolvers. This is almost always going to be the DNS servers of your ISP unless you’ve manually assigned them to other external DNS servers and/or your own internal DNS servers.
DNS-over-HTTPS (DoH) encrypts DNS queries using the same protocol that secures websites: HTTPS (port 443). Technitium supports DoH both as a client and a server, so when Technitium forwards queries that it hasn’t cached to external DNS servers (e.g., Cloudflare, Google), it can use DoH to protect outbound DNS traffic. Do note that those external DNS servers need to support DoH.
Navigate to Settings -> Proxy & Forwarders and then make sure that DNS-over-HTTPS is enabled. I also recommend enabling concurrent forwarding, default values work just fine here.
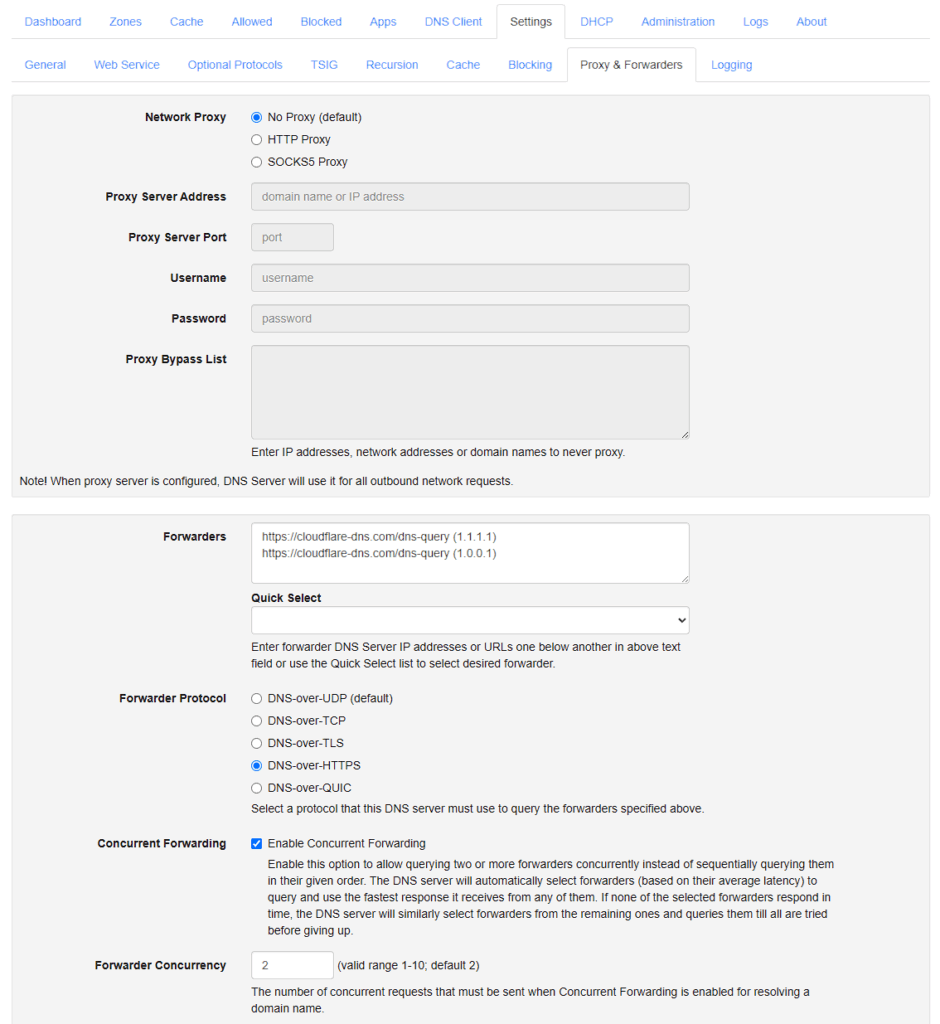
Screenshot of the configuration of our DNS forwarders for upstream requests.